 +
+ 
We previously wrote how to install Redis Cache on a Ubuntu Server with both PHP 5 and PHP 7. Those tutorials were mainly for ownCloud users, but could also be implemented on WordPress, or any other service as well. The only difference is where to put the configuration to get Redis Cache working – in this case on WordPress.
Did you know we have released a WordPress VM as well? It has the latest PHP 7 and Redis Cache pre-installed. Download it and give it a test run, you will get amazed by the speed!
Already installed Redis on your server?
All and all it’s a really simple task. If you are a server owner and you already have Redis Cache installed, then only thing you have to do is to add Redis to your wp-config.php as well, plus downloading the Redis Object Cache plugin that we will use in this tutorial.
Not installed Redis on your server?
If never used Redis Cache before, or if you use W3 TOTAL CACHE today, we really encourage you to switch to Redis Object Cache instead. This is because you have more control over Redis Cache on the backend, and you can use the same installation for multiple sites, plus your ownCloud or whatever you use on your server or VPS. But before you do, you have to install Redis on the backend of your server first. Do this by simply follow one of the guides for PHP 5 or PHP 7.
Tutorial
OK, so you have installed Redis on the backend, now you need to activate it on your frontend as well. It’s really simple and take about 5-10 minutes. We will use the default settings just to keep things as easy as possible, but you could also tweak it a bit if you are a more experienced user. You could for example use a UNIX socket instead of port 6379, and some other tweaks that we wrote about in this post.
-
Install Redis Cache Server on the backend
-
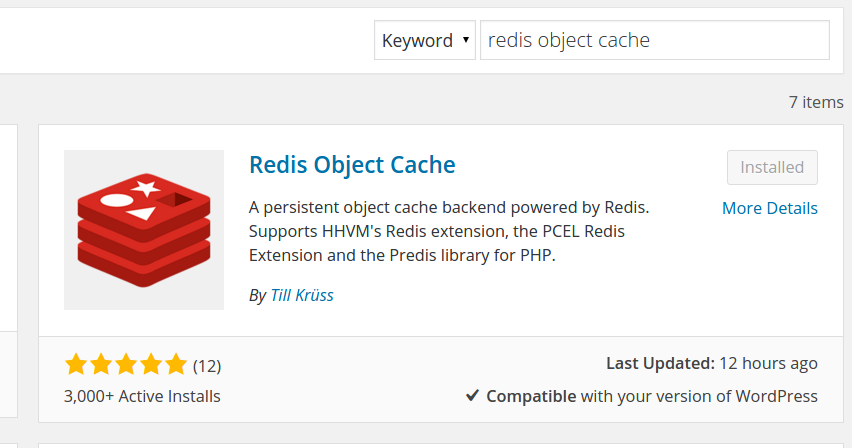
Install the Redis Object Cache plugin
The most simple way is to go to plugins on your WordPress installation and search for Redis Object Cache, then install it from there.
-
Make the nessesary changes in wp-config.php
If you didn’t make any tweaks such as using a UNIX socket instead of localhost and port 6379, then you don’t have to make any more changes. Just activate the plugin, and it should be up and running. If you on the other hand made some changes for example using the UNIX socket, you have to add those changes to your wp.config.php
$~: sudo nano /var/www/html/your-site.com/wp-config.php
For UNIX socket, add this:
/** REDIS SOCKET */
define( 'WP_REDIS_SCHEME', 'unix' );

/** REDIS PATH TO SOCKET */
define( 'WP_REDIS_PATH', '/var/run/redis.sock' );
You can find more settings on this page.
-
Check that it’s enabled
Check that Redis Cache is activated by typing this command in your terminal:
$~: redis-cli monitor
or if you are on a UNIX socket
$~: redis-cli -s /var/run/redis.sock monitor
The output should look something like this:
OK
1412273195.815838 "monitor"
1412273198.428472 "EXISTS" "wp_:default:is_blog_installed"
1412273198.428650 "GET" "wp_:default:is_blog_installed"
1412273198.432252 "EXISTS" "wp_:options:notoptions"
1412273198.432443 "GET" "wp_:options:notoptions"
1412273198.432626 "EXISTS" "wp_:options:alloptions"
1412273198.432799 "GET" "wp_:options:alloptions"
1412273198.433572 "EXISTS" "ewp_site-options:0:notoptions"
1412273198.433729 "EXISTS" "wp_:options:notoptions"
1412273198.433876 "GET" "wp_:options:notoptions"
1412273198.434018 "EXISTS" "wp_:options:alloptions"
1412273198.434161 "GET" "wp_:options:alloptions"
1412273198.434745 "EXISTS" "wp_:options:notoptions"
1412273198.434921 "GET" "wp_:options:notoptions"
1412273198.435058 "EXISTS" "wp_:options:alloptions"
1412273198.435193 "GET" "wp_:options:alloptions"
1412273198.435737 "EXISTS" "ewp_:options:notoptions"
1412273198.435885 "GET" "wp_:options:notoptions"
1412273198.436022 "EXISTS" "wp_:options:alloptions"
1412273198.436157 "GET" "wp_:options:alloptions"
1412273198.438298 "EXISTS" "wp_:options:notoptions"
1412273198.438418 "GET" "wp_:options:notoptions"
1412273198.438598 "EXISTS" "wp_:options:alloptions"
1412273198.438700 "GET" "wp_:options:alloptions"
End by pressing [CTRL+C]
You could also check that it’s enabled by going to settings and press Redis. The this should show up:
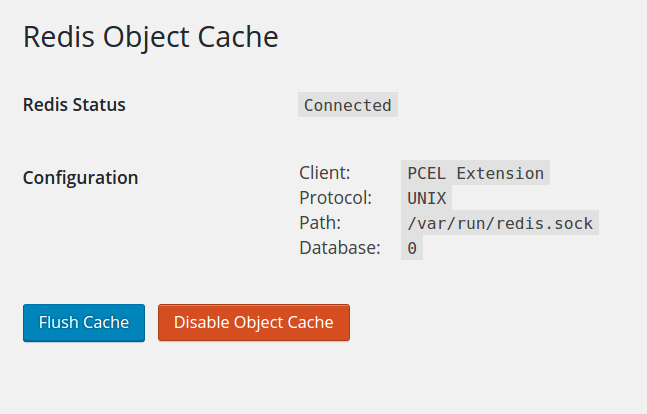 You might have to flush the DB if you can’t see this screen.
$~: redis-cli flushdb
or if you are on a UNIX socket
$~: redis-cli -s /var/run/redis.sock flushdb
-
That’s all!